|
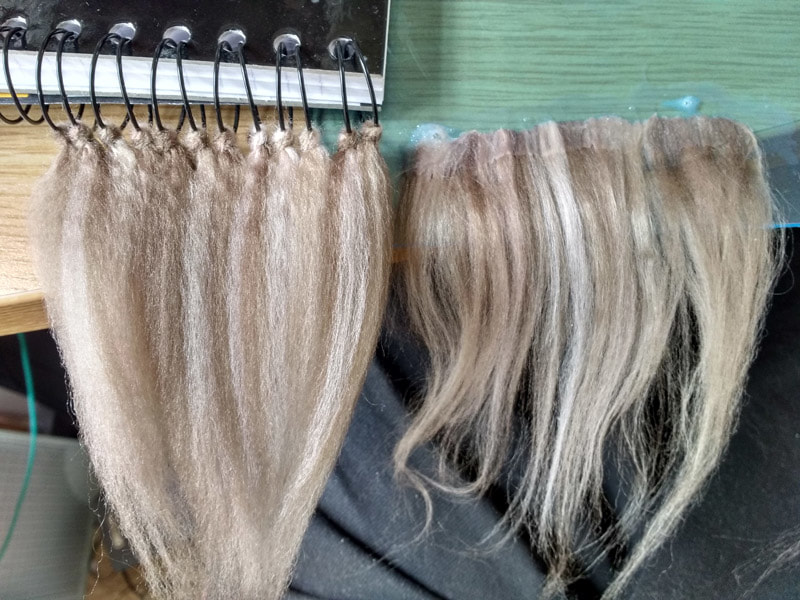
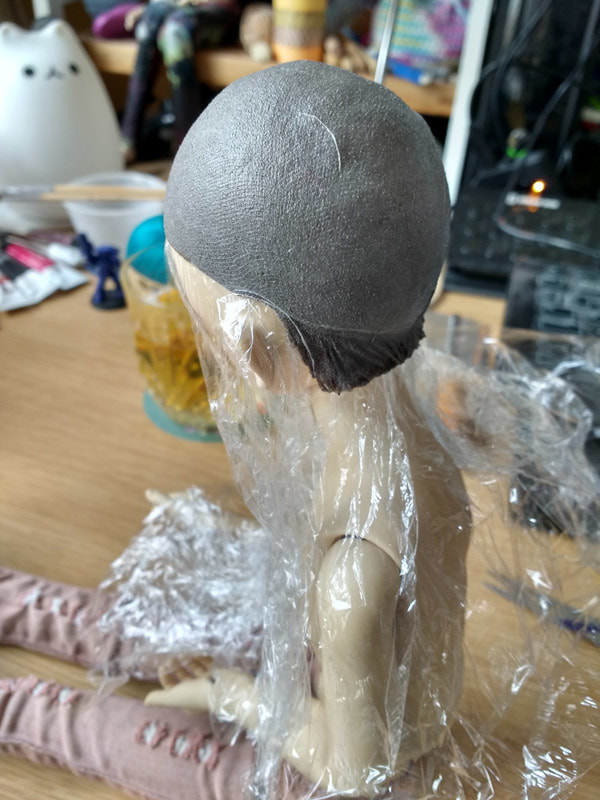
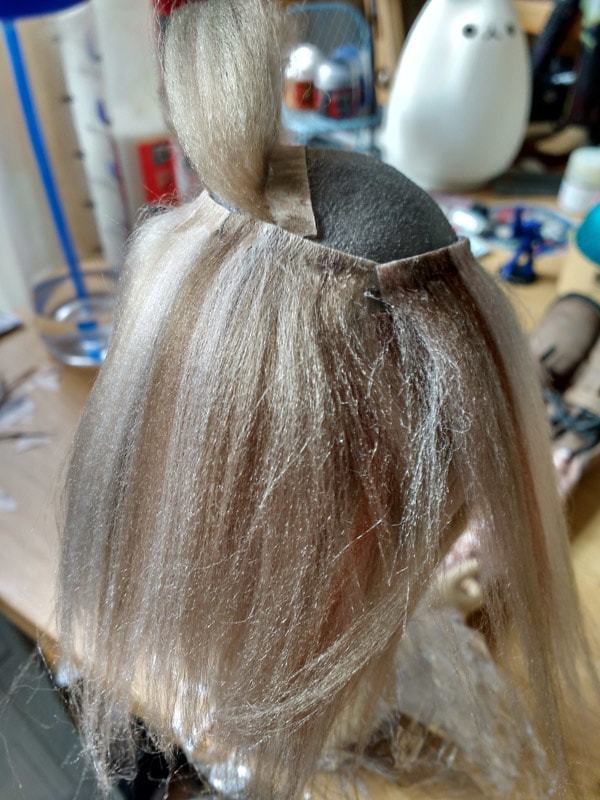
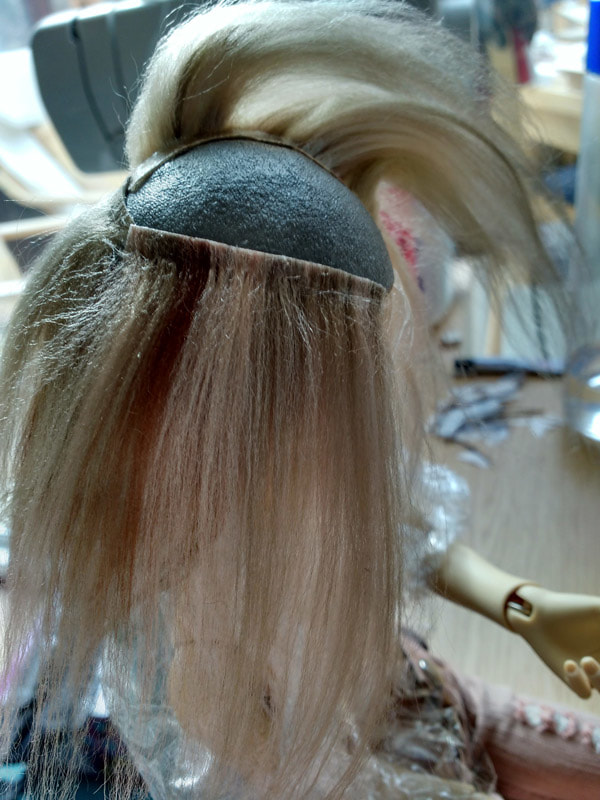
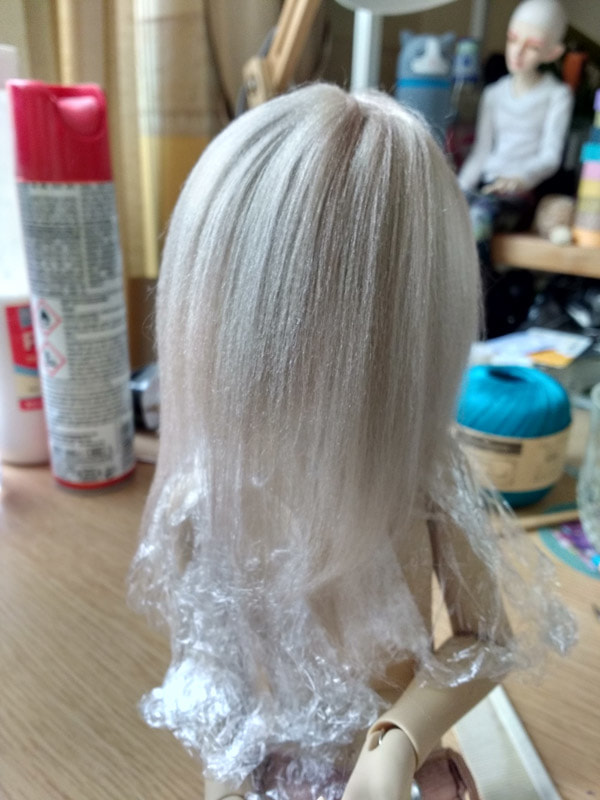
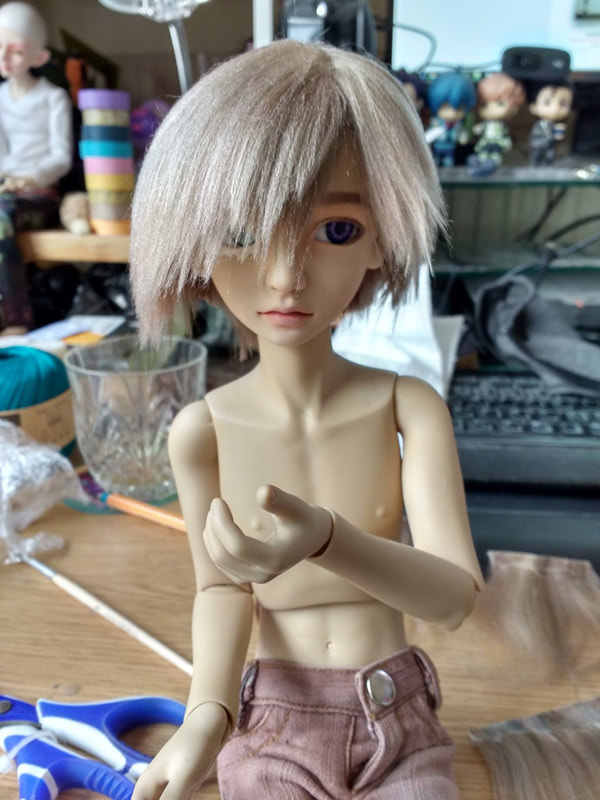
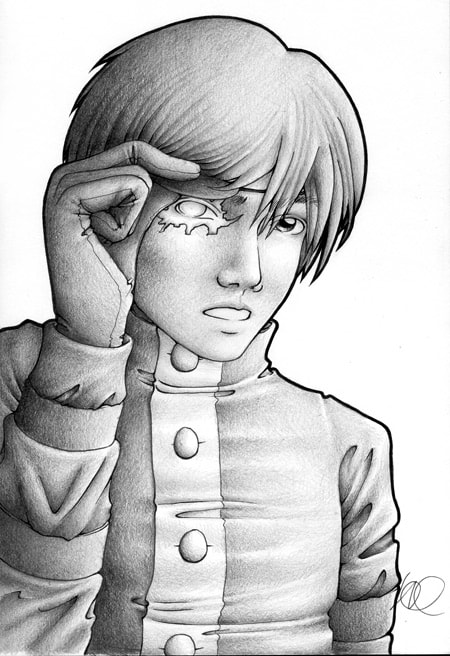
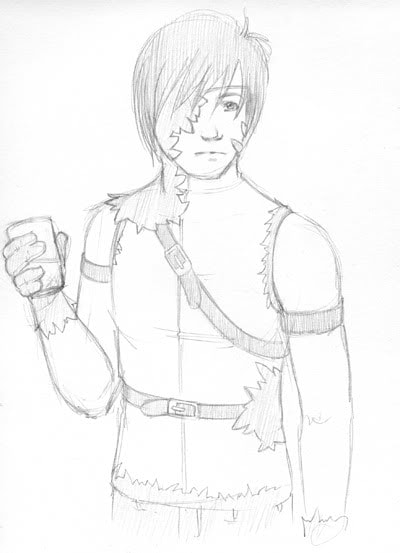
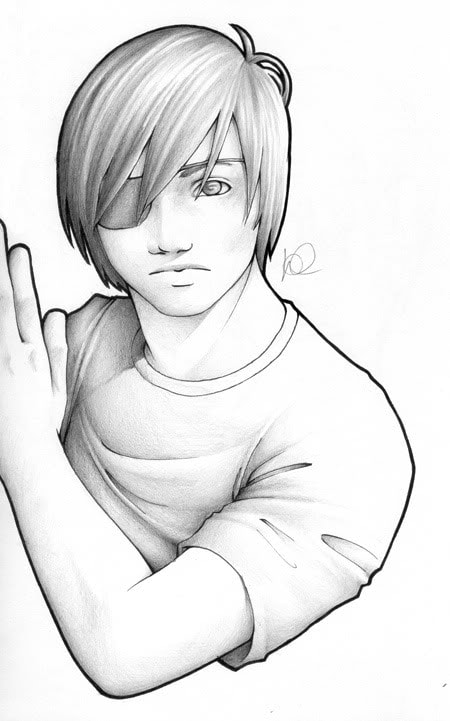
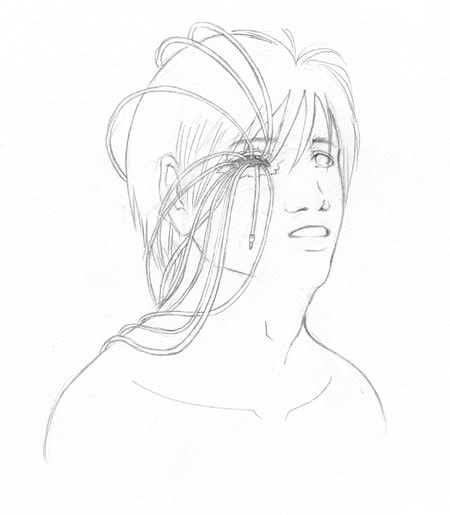
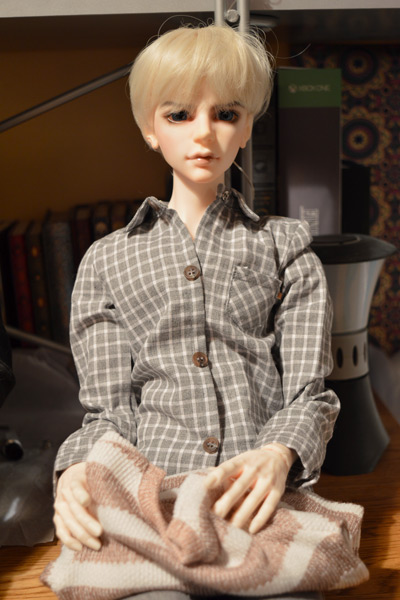
The thing with dolls is, you always want them to have the perfect hair for their character, don't you? And finding the right wig is near impossible sometimes (particularly if your character has pink hair *cough*Maxim*cough* or a white stripe from an accident *cough*Kirill*cough*). Which is why I wanted to learn to make my own doll wigs instead. And, thanks to the wonders of YouTube and Mozekyto's doll wig tutorials, it turns out it's not quite as hard as I thought. Well. It is, but not quite in the way I thought. Full disclaimer: this isn't my first attempt at a wig. It's actually my fourth hard cap (don't ask about the first attempt), my third go at brushing and then straightening wefts (Maxim was my first), and my second go at actually gluing the wefts down. My first was Kirill... 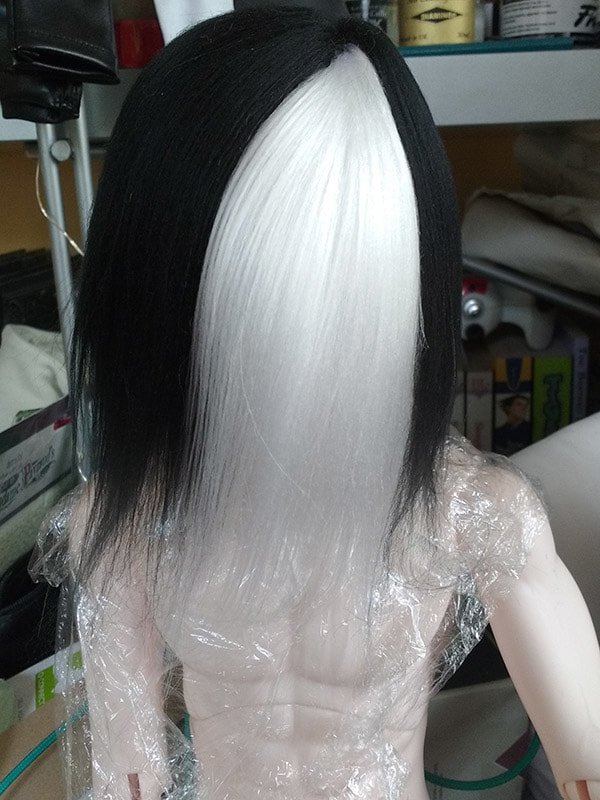 I took this on the 1st July 2017. He still looks like this now. It turns out the problem I have isn't so much the sticking down of the hair (although that's certainly problematic enough). I just have zero talent with actually cutting hair. I'm sure I must have a natural aptitude for something somewhere, but hairdressing ain't it. Given my approach to hair is to have as little of it as possible this isn't really a surprise. So the thought of making Paradigm's wig wasn't so much a fear of the making of it, I've done that before. It was the cutting of it. So with great trepidation, I got cracking on the fiddly bits. Because the longer it takes to do the fiddly bits, the longer I can put off cutting it, right?  In true Blue Peter style, here are some I made earlier. And there are quite a few fiddly bits to do. I wound the lengths of 100% acrylic yarn around the notebook longways, then cut at top and bottom. I then grouped them into sets of three and knotted them into the rings of the book so each side was approximately the same length. These were tied the whole length of the rings, and then vigorously assaulted — sorry, brushed — with a metal-toothed brush. Once all the wefts were smoothed out and combed until there was no longer any yarn loss, they were smoothed over with a hair straightener, resulting in a noticeable difference in texture. They're also super-soft at this point. For reasons I've never quite worked out, my hair straighteners have an odd habit of turning the yarn funny colours when it's warm — briefly green, in this case — which you can kind of see on the leftmost picture, but it wears off as the wefts cool. They're then cut into sections and glued onto a sheet of still-wrapped clear acrylic I no longer remember why I own, and once the glue has set (which takes forever) I peel from the board and trim the tops and edges until they're neat but still useable. Then comes the 'fun' bit. Yep, time to glue the wefts down. I started with Mozekyto's method of laying down the parting first, which later proved ... interesting when one of the two wefts used for his parting actually vanished. I have no idea where it went and luckily it wasn't too difficult to replace it at the late stage of, you know, having almost finished. I'd done my wefts in colour batches, with the lightest grouped together and then a set of increasingly dark ones. (I still have a lot of yarn; I need more brunet characters) The lightest went into the parting, and I then started properly at the bottom with the darkest in an effort to mimic natural hair. Yes I'm aware the bottom of his wig cap went crump. It was a challenge to get the weft to stick to it, but I got there in the end and you can't see it now. I moved up in rows, trimming the back into a rough, short 'V' shape as I went and setting aside the wefts cut "just in case." When I reached the ears I started moving all the way around the wig cap, and stopped trimming. Obviously I reached the parting on one side faster than the other, so I added more hair to the other side until I'd filled up the cap with fairly evenly-spaced wefts. ...Which left me with a second doll equivalent of Cousin It from The Addams Family. Only this time I couldn't really get away with just leaving him like it. Wellll, I could, but it wouldn't get me anywhere, so out came the scissors and off went chunks of Paradigm's hair. But it's not easy to style hair that's trying to stick out like a chimney sweep's brush so the cling film that'd so recently been under his wig cap went back on over it instead in a desperate effort to tame it, and it got left overnight. Then it was onto the finer scissors and lots of very cautious, very nervous upward snipping and... well... 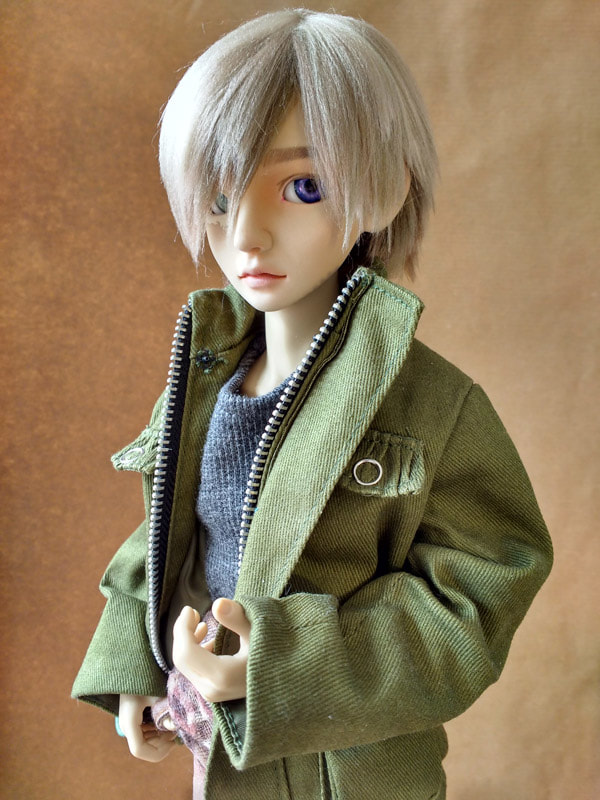 There's a spot of Leon Kennedy about his hair I never noticed before and my iffy cellphone photo made it (and him) look a lot lighter than it is in person, but I'm happy with it. It's scruffy, but intentionally — no intergalactically-wanted spaceship thief would stop off and get his hair professionally trimmed every six to eight weeks. The biggest challenge was getting it to look like my really old drawings of him. He's a character I've had since at least 2007 and he's amassed a chunk of artwork dedicated to him (although depressingly the best stuff is from 2007 and not really the later stuff of him I did). I sat there for a while staring at his hair in the drawings and thinking "you utter moron, why did you draw it like that?" (Because in 2007 I never thought I'd have a doll version of him, that's why, self.)
0 Comments
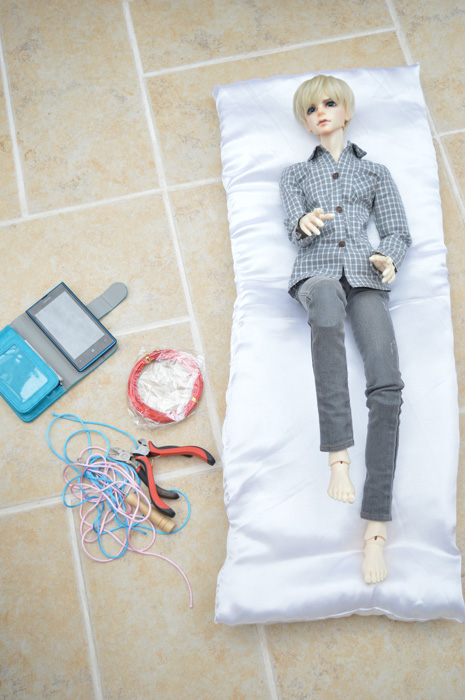
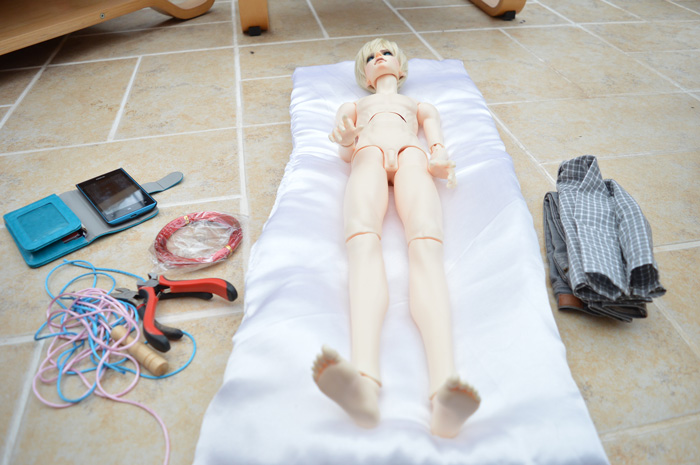
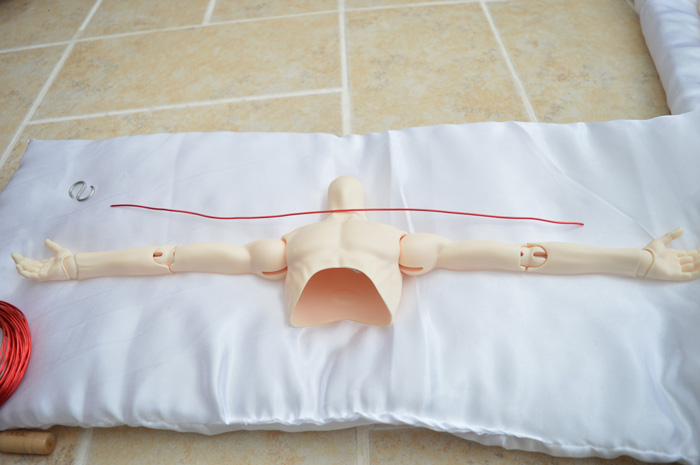
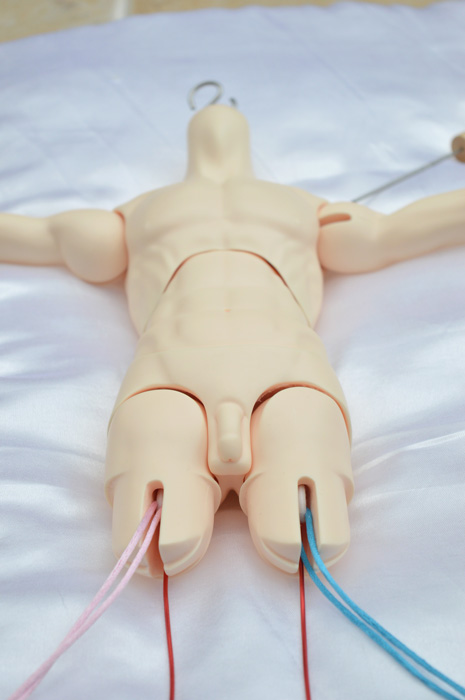
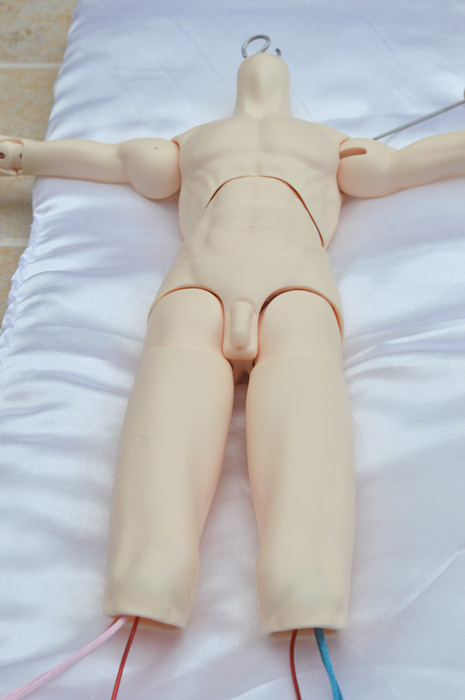
 You know how I mentioned the next step with Scott the Noodoll was re-restringing and wiring? Well today, my order of two gauges of red wire arrived, and it was time for the noodoll to bite the bullet. Or the wire. I decided the conservatory was a great place to do it, because bright natural light, but then proceeded to be thwarted at every turn by the weather steadily clouding over and a dog that decided that surely she was more important than what I was doing and made sure to get in the way as often as possible (and then spent the time she wasn't getting in the way laying behind me and blocking the door, just in case I tried to leave). But I pressed on, because frankly he's driving me up the wall now. I should warn — although it should be fairly obvious — that the below gallery contains doll nudity, because it's very hard to take apart a fully clothed doll. The Process I started out with my regular restringing tools (which is to say an MSD-sized head puller and two pieces of rattail cord — who says you need sensible tools?!), my wire (in a very fetching shade of red), my phone (I didn't want to miss my next work shift) and the obligatory wire cutters (very difficult to wire him otherwise). (1)
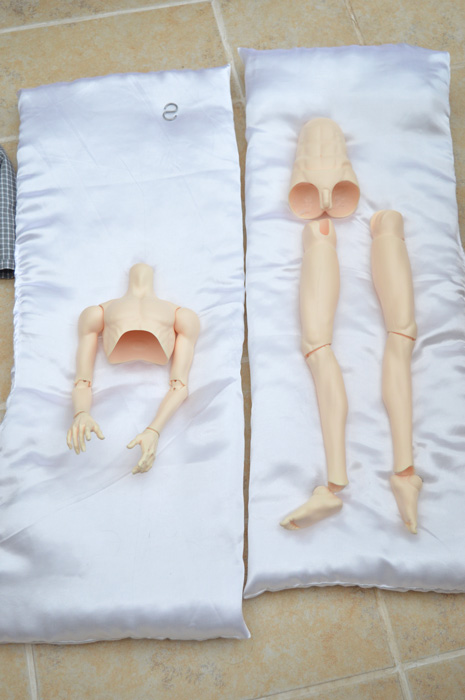
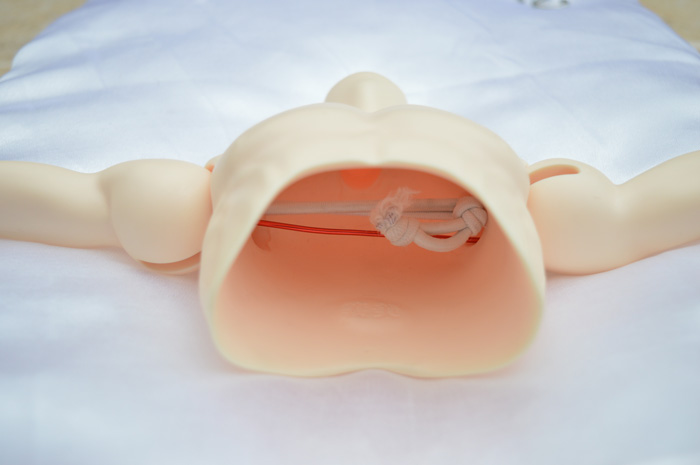
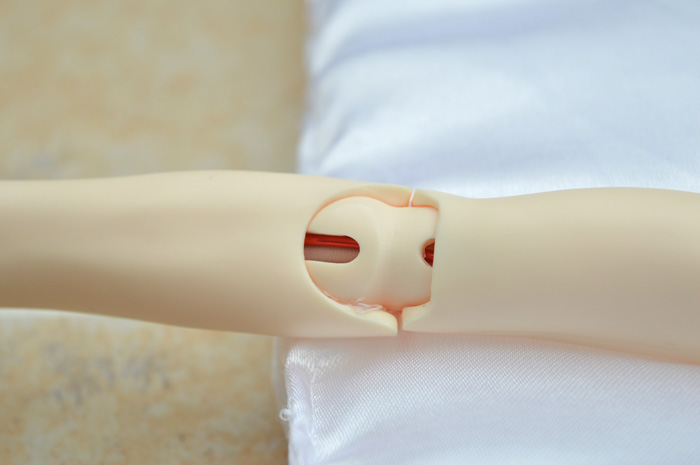
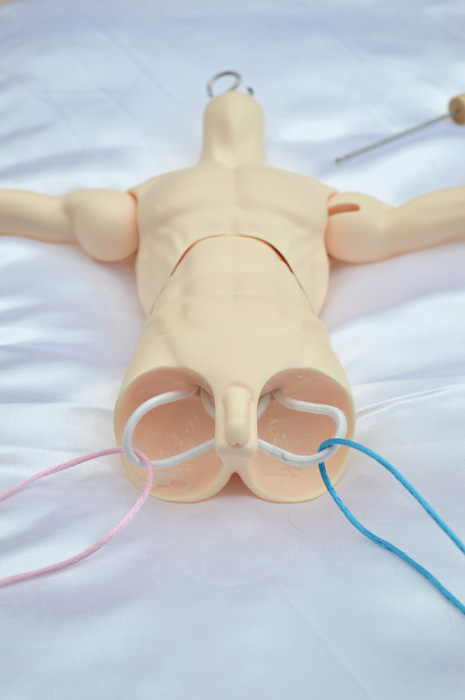
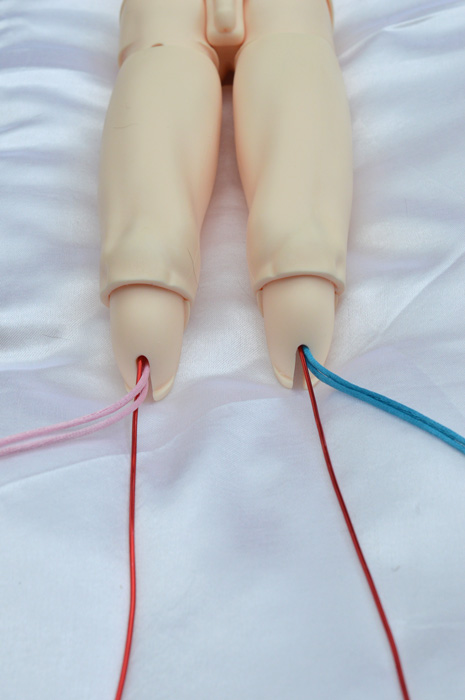
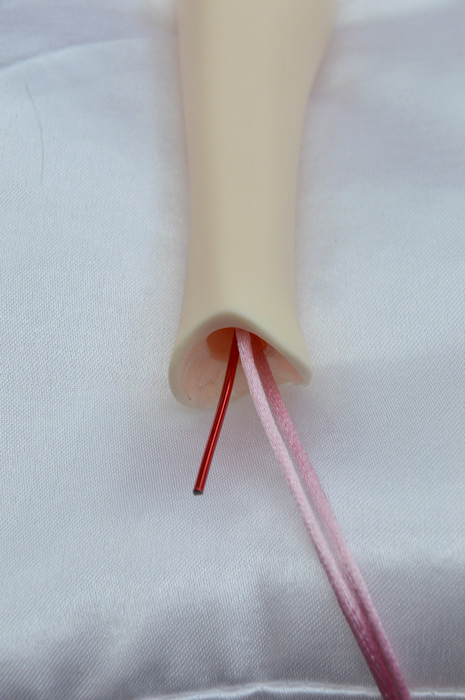
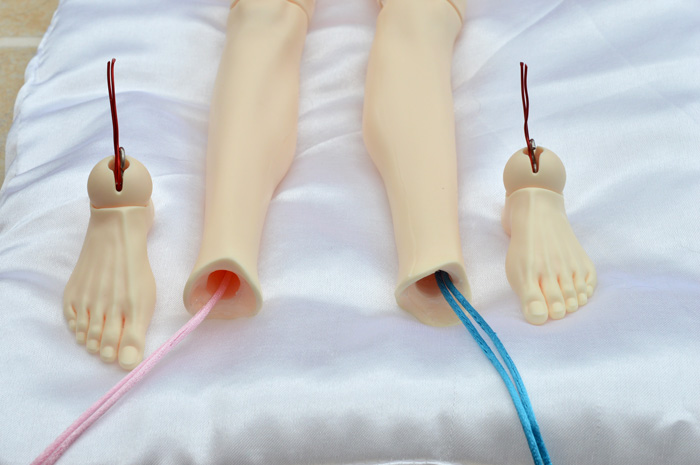
Once divested of his clothing (2), I unhooked his feet and pulled out his elastic (3), but didn't unstring his arms as I've already got those how I wanted. It made wiring them a little harder, mind. I cut the wire to stretch from the middle(ish) of one forearm to the middle(ish) of another (4, 5) and, removing one hand to make things a little easier — read that as being said with a hollow laugh — and then ended up having to use the rattail to slipknot the elastic to my ankle to stop it making an escape attempt through Scott's body. No photos of that, partially because it was awkward and mostly because I looked like a complete idiot. Once that was done (6, 7), I adjusted the position of the knot in Scott's torso elastic (again), measured out his wire — twice the length of one leg ending halfway up his shin, but with some leeway — and began restringing him the way April Story sent him. I figured I might as well stick with it, particularly since this time I could remember where the H-shape went (8). It is significantly easier to string the doll with the wire in place rather than trying to push it along, but I had to run the cord through the leg before I ran the wire or it became an exercise in frustrating futility due to the size of the holes, the size of the cord and the fact there's still a whole bunch of ragged resin in there. I did the same with each part of his leg until I got to his feet, but didn't worry about pulling the elastic through the legs until I'd got them all pretty much assembled. I hate the way it snaps back the moment you take your eye off it otherwise (9, 10, 11). And then my leeway turned out to be inevitably too long (12), so off came the shin again and off went the excess (13). The feet... well, Scott's biggest problem has always been his ankles (his knees mostly cooperating with the help of a large amount of hot glue sueding), and everything I'd read about wiring ended at the shins... which doesn't help. I initially thought about looping the end of the leg wire around the hook in his foot, but it seemed like too much hassle and would only be manageable on the first foot you did it on, near-impossible on the second. So the next step was to use the thinner wire and hook it through the ring to run alongside the S-hook. (14) Now, I'm not sure how much use this actually will have: it's just as mobile as the S-hook when you think about it and to really make a difference I think I'd have to use a thicker, firmer wire (but not as thick as the wire I used in his body as I already tried that; too big to fit through the ankle ball) and do some creative shaping to keep it firmly placed inside his shin. And yet, despite this, it gives the impression of having helped. I don't know how much of it is true (did the act of putting it in there make me think he's a little more stable? etc.), but there we go. Maybe I'll explore this some more in the future. Scott won't ever stand unaided, but he can finally lift his arms and keep them up there (15)... and give him something to lean against, and he might just do. Finally.
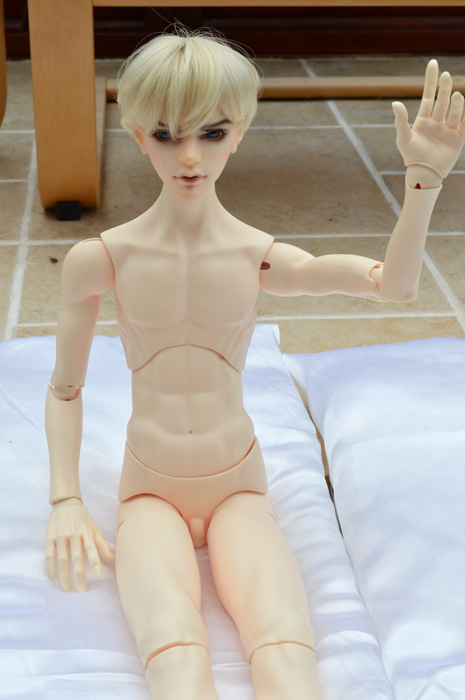
Either way, even after I restrung him (twice) and tightened up his strings, he still couldn't stand unaided.
So I inexpertly sueded him with a cool-melt glue gun, using a silicone wig cap that doesn't appear to effectively fit anyone to help smear the glue around (surprisingly helpful). And it sort of helped, in that his hands and knees remain in place and his feet don't really wander off any more, but he still can't stand because although his knees no longer crumple under his weight, his feet won't keep him upright and he just topples forward instead. So the next step, it looks like, is another restring and some wiring. Which should be interesting because I have no idea what I'm doing. I have no idea if there's a specific kind of wire that would work or if regular jewellery wire would (which I have plenty of, most copper- and some silver-filled, in various gauges), but... in a perverse way I'm looking forward to learning. And his arms need restringing again, because I ballsed that up. It's a bit of a disappointment he still can't stand beside Tay (who, being a Granado Evol doll, stands like a rock), but... I'm hoping we'll get there in the end. I'm hoping that if/when he does I'll have this massive sense of satisfaction at how much I've learned just through him. ...We'll see, anyway. |
Pax AsteriaeA noodler with a doll obsession. Archives
July 2019
Categories
All
|


 RSS Feed